
2. My albums
The screen where you choose which album to watch and where you change or delete your albums.
How to get there
- When you open Pixetia, in the “Watch this album?” prompt, press Change album ⚙.
- During the slideshow, press ↑ or ↓ to open the icons, choose the little house (top left) and press OK. See The slideshow and the remote.
- If the remote has a Menu key, it also takes you here.
What you see in the list
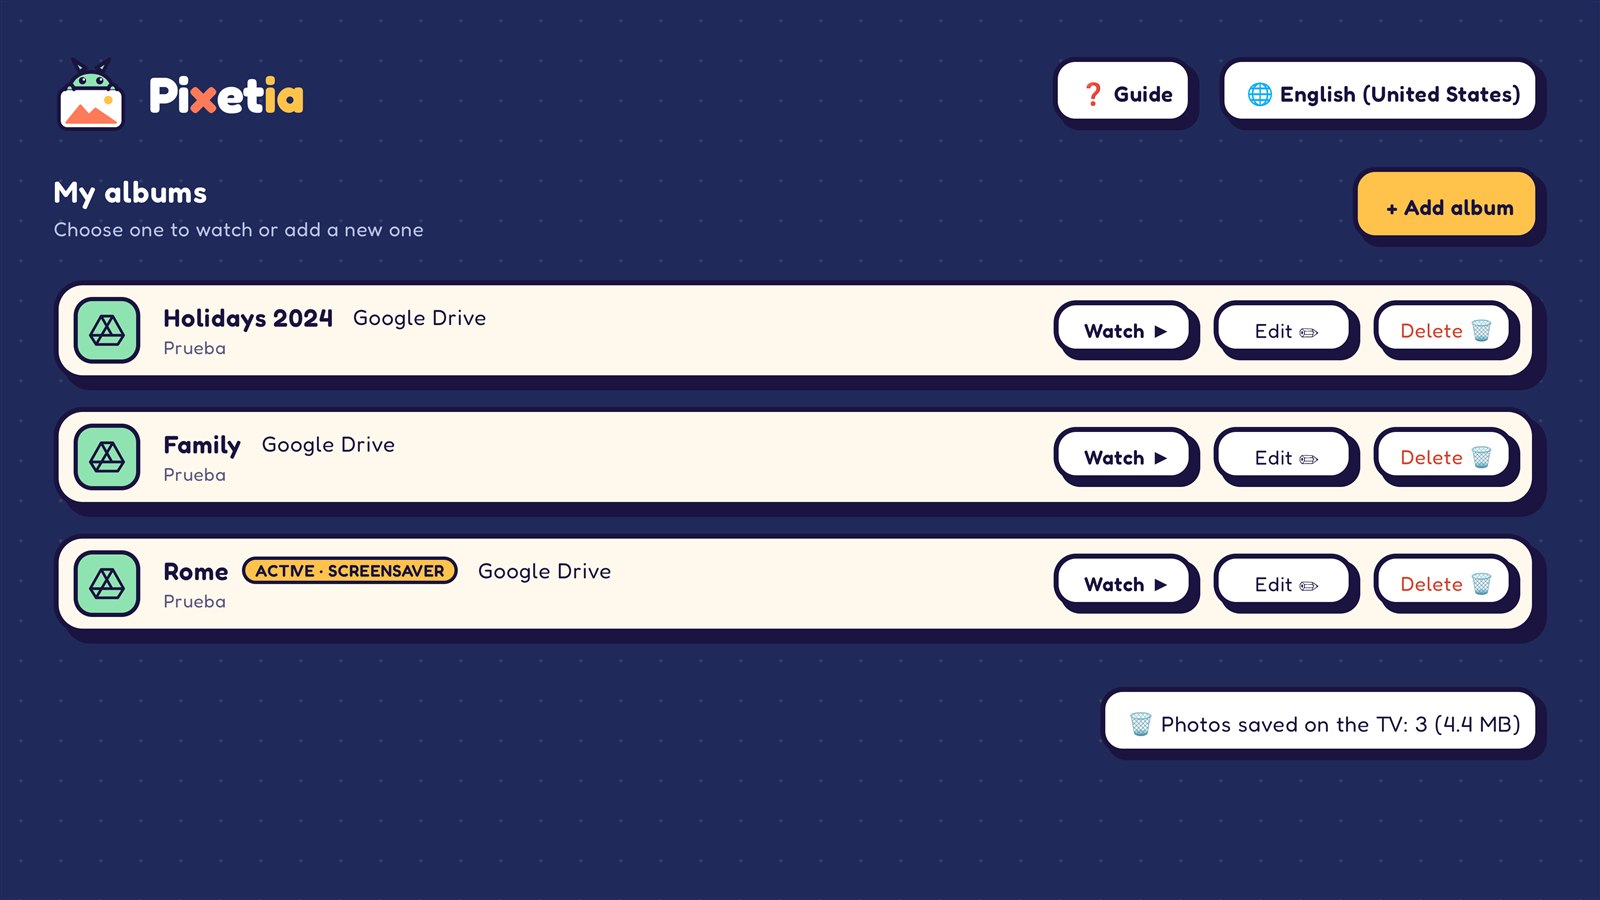
Each album takes up one row with:
- An icon that shows where its photos come from (network, USB, Google Photos, OneDrive…).
- Its name, the type of source (for example “Network / NAS” or “Google Drive”) and, below, its folders.
- Three buttons: Watch ▶, Edit ✏ and Delete 🗑.
If you have many albums, the notice “More albums below ▼” appears at the bottom. Go down with ↓ to see them.
The active album
One of your albums has the yellow label ACTIVE · SCREENSAVER. It’s the last one you started watching, and it’s the one that:
- Pixetia offers you when you open it (“Watch this album?”);
- appears as the screensaver when the TV is idle.
To make another album the active one, press its Watch ▶ button.
Watching an album
- With the arrows, go to the Watch ▶ button of the album you want.
- Press OK. The slideshow starts and that album becomes the active one.
Changing an album
- Press Edit ✏ on the album.
- Change whatever you want: the name, the folders or the options.
- Go down to the end and press:
- Save: saves the changes and takes you back to “My albums”, with that album’s Watch ▶ button selected. The active album doesn’t change.
- Save and view ▶: saves the changes, makes it the active album and starts watching it.
If you change your mind, press Cancel or Back. If you had changed something, Pixetia asks “Discard changes?”: choose Discard to leave without saving, or Keep editing.
Deleting an album
- Press Delete 🗑 on the album.
- Pixetia asks “Delete album?”. Press Delete 🗑 to confirm, or Cancel.
Don’t worry: your photos are not deleted
Deleting an album only removes it from Pixetia. The photos stay where they were: on the computer, on the USB drive or in the cloud.
Other buttons on this screen
- + Add album, top right: creates a new album. See Adding an album.
- ❓ Guide, at the very top: shows a QR code; scan it with your phone camera and this guide opens.
- 🌐 English (United States), at the very top: changes the language. See Changing the language.
- 🗑 Photos saved on the TV: 15 (9.2 MB), at the end of the list: only appears if Pixetia has saved photos from the cloud. See Photos saved on the TV.
If you press Back on this screen, you go back to the slideshow. (If you don’t have any album, Pixetia asks “Quit Pixetia?”.)