
3. Adding an album
The steps are almost the same wherever your photos are. Here is the whole process; the details for each place are in Photos at home and Photos in the cloud.
Step 1: choose where the photos are
- In My albums, press + Add album.
- The question “Where are your photos?” appears. Choose an option with the arrows and press OK.
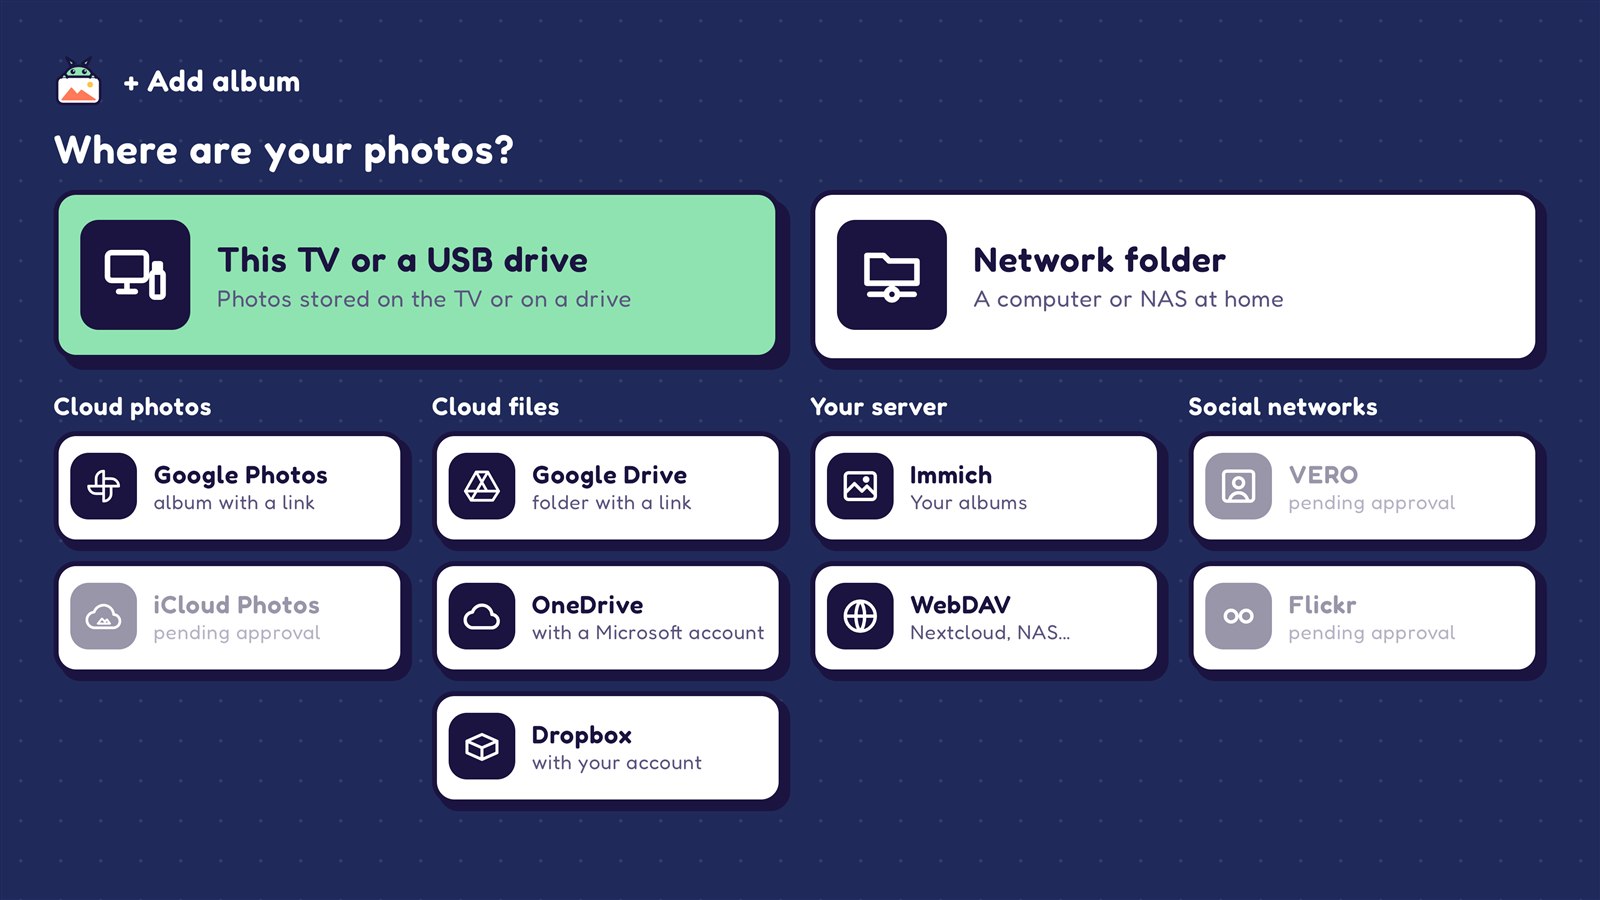
| Option | Choose it if your photos are… |
|---|---|
| This TV or a USB drive | in the TV’s memory or on a USB stick or drive connected to it. |
| Network folder | on a computer or a NAS at home, in a shared folder. |
| Google Photos | in a Google Photos album. |
| Google Drive | in a Google Drive folder. |
| OneDrive | in OneDrive, with your Microsoft account. |
| Dropbox | in Dropbox, with your account. |
| Immich | on your own Immich photo server. |
| WebDAV | on a WebDAV server, such as Nextcloud or some NAS devices. |
NAS: a small device with disks that stores files for the whole household and connects to the router.
Grayed-out options: “pending approval”
iCloud Photos, VERO and Flickr appear in gray, with the text “pending approval”. They can’t be used yet: Pixetia is waiting for the go-ahead from the company behind each service. If you choose one, a notice explaining this is all you’ll see. They will be enabled in an update once they are approved.
Step 2: add the folder
Now “Your photos are in” appears at the top with the chosen source and, next to it, the Change button in case you made a mistake.
Below, you’ll see what that source needs. Depending on the case:
- Choose folders with the remote in a browser (TV, USB, network, OneDrive, Dropbox, WebDAV, Immich).
- Send a link (Google Photos, Google Drive). The easiest way is to send it from your phone: see Using your phone.
How to use the folder browser
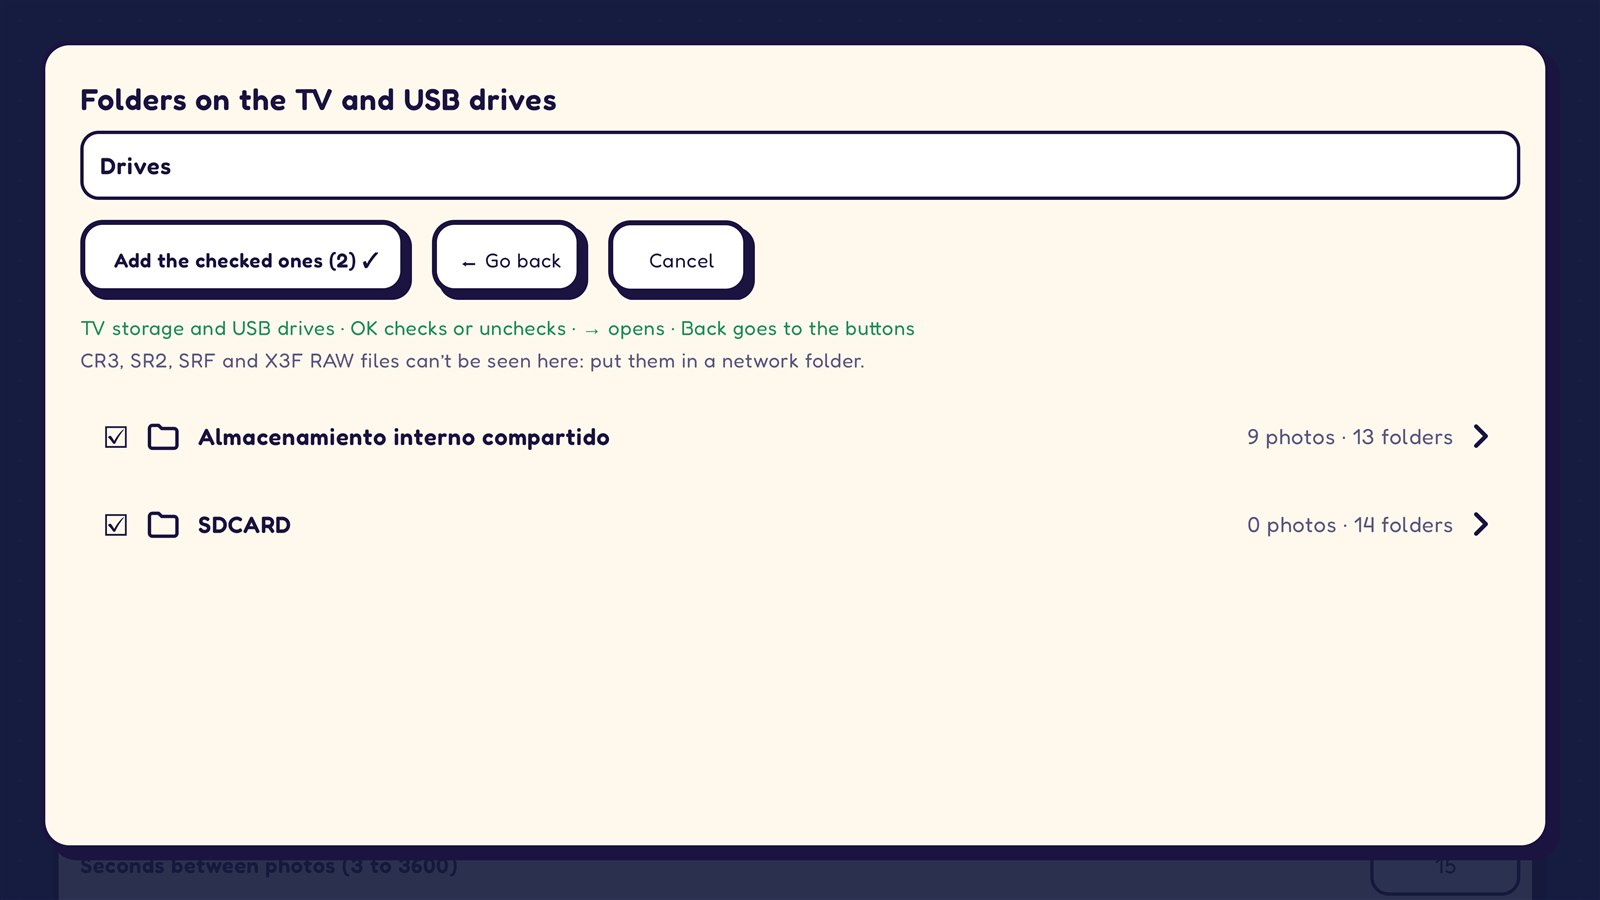
The browser shows a list of folders. Each row says how many photos and subfolders it has (for example “120 photos · 3 folders”).
| Key | What it does |
|---|---|
| ↑ ↓ | Move through the list. |
| OK | Check or uncheck the folder (☐ / ☑). You can check several. |
| → | Open the folder to see what’s inside. |
| ← | Go back to the folder above. |
| Back | Jump from the list to the buttons (and from the buttons to the list). |
When you have what you want, use one of these buttons:
- Add the checked ones (2) ✓: adds all the folders you have checked.
- Add this folder ✓: adds the folder you are in now.
- ⬅ Go back: goes up to the previous folder.
Step 3: another folder?
When you add a folder, Pixetia confirms it (“Folder added · the album has 1 folder”) and asks “Do you want to add another folder to the album? It can be from another source.”
- Yes, add another: you go back to “Where are your photos?”. You can mix sources: for example, a folder on your computer and a Google Photos album in the same album.
- No, that’s all: you continue with the name.
Step 4: the album name
Pixetia suggests names taken from the folders, with the question “What do you want to call the album?”. For example, for the folder “2024-05 Rome” it suggests “Rome”, “Rome (May 2024)” and “2024-05 Rome”.
- Choose one from the list and press OK.
- Or choose ✏ Type another name and type it yourself in the “Album name” field.
If you don’t choose anything, the album is called “Album #1”, “Album #2”…
Step 5: save
- If you like, check the album options and the background music, which are further down.
- Go down to the end and press Save and use ▶.
- The album is saved, becomes the active one and the slideshow starts.
If the album doesn’t have any folder, Pixetia warns you: “Add at least one folder to the album.”
The album’s folders
In the album form, the “Album folders” section shows all its folders. For each one you can:
- Check “Include subfolders”: the photos in the folders inside it are shown too.
- Press Remove: the folder is no longer part of the album. Pixetia first asks “Remove this folder from the album?”. The folder and its photos are not deleted.
If one of the folders doesn’t respond (for example, the computer is switched off), the slideshow continues with the others and warns you with “Can’t be read right now: …”.