
4. Photos at home
How to add photos that are on the TV, on a USB drive, on a computer or NAS at home, or on your own server.
Before you start, see how to use the folder browser: it works the same way in all these options.
This TV or a USB drive
For photos stored in the TV’s memory or on a USB stick or drive connected to it.
- If you use a USB drive, connect it to the TV before you start.
- In “Where are your photos?”, choose This TV or a USB drive.
- The first time, the TV asks whether you allow Pixetia to access your photos. Accept. Without that permission Pixetia can’t read them.
- Press Browse folders 📁. You’ll see “Drives”: the TV’s memory and each connected USB drive.
- Go in with → to the photo folder, check it with OK and press Add the checked ones ✓ (or Add this folder ✓).
Network folder (computer or NAS)
For photos in a shared folder on a computer or NAS at home. A shared folder is a folder that the computer lets other devices on the home network see. In Windows you share it from the folder’s properties, “Sharing” tab.
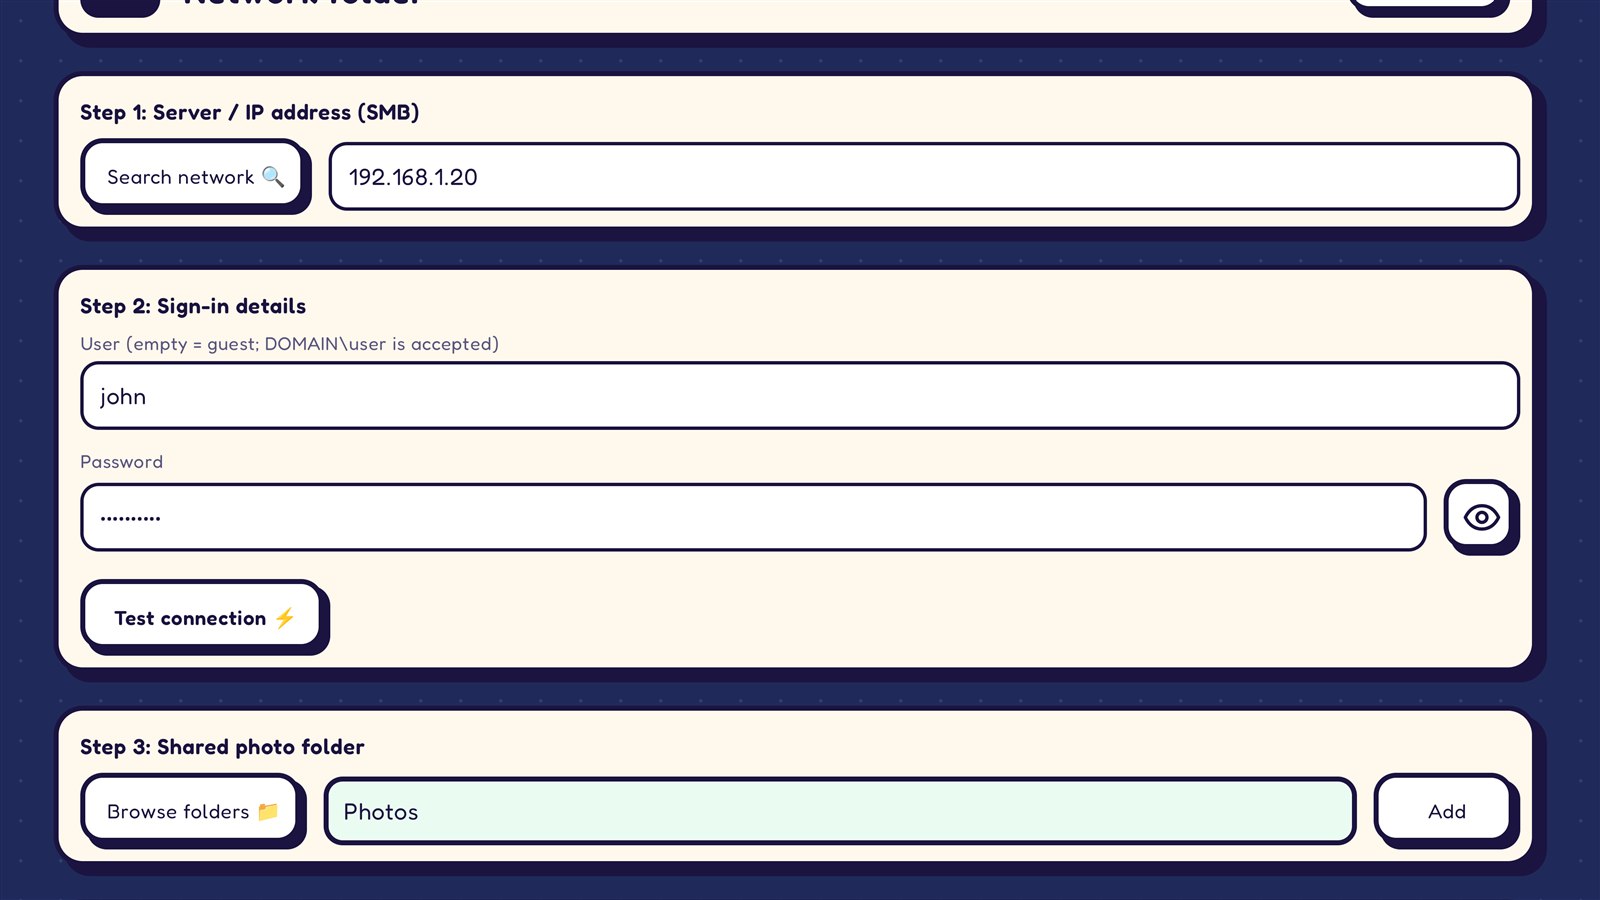
The form has three steps.
Step 1: Server / IP address
- Press Search network 🔍. Pixetia looks for devices at home that have shared folders.
- Choose your computer or NAS from the “-- Select a detected computer --” list.
- If it doesn’t appear, type its IP address (for example 192.168.1.20) or its name yourself.
IP address: the number that identifies each device on the home network, like 192.168.1.20. In Windows you can see it in Settings → Network & internet → your connection’s properties.
Step 2: Sign-in details
- User: the user on the computer or NAS. Leave it empty if the folder is open to everyone (Pixetia will sign in as a “guest”). If your computer is on a company domain, type
DOMAIN\user. - Password: that user’s password. Leave it blank if the folder is open to everyone.
Step 3: Shared photo folder
- Press Browse folders 📁. You’ll see the computer’s shared folders.
- Go in with →, check with OK and press Add the checked ones ✓.
- If you know the exact name of the shared folder, you can also type it and press Add.
With Test connection ⚡ you check that everything is fine: Pixetia says how many photos it finds.
WebDAV (Nextcloud and others)
WebDAV is a way of sharing files over the web. It’s used by Nextcloud, ownCloud and many NAS devices.
- Choose WebDAV under “Your server”.
- Type the server address. Examples:
- A NAS at home:
http://192.168.1.20:8080 - Nextcloud:
https://yourcloud.com/remote.php/dav/files/user
- A NAS at home:
- If the server asks for a user and password, type them. With “Show password” you can check you typed it correctly.
- Press Browse folders 📁 and choose the folders. Or press Add this address to use the typed folder directly.
With New server + you can add folders from another WebDAV server to the same album.
Pixetia only reads the photos; it doesn’t change anything on the server.
Immich
Immich is a program for having your own “Google Photos” on a computer or NAS at home.
- Choose Immich under “Your server”.
- Type the server address, for example
192.168.1.20:2283orhttps://photos.yourdomain.com. - Type your Immich email and password. (If you prefer, leave the email empty and put an Immich API key in the password.)
- Press Connect and choose albums 📂.
- Check the albums you want and add them. If you don’t check any, you can use Add the whole library ✓.
Pixetia creates a key called “Pixetia” on your server that can only read, and it doesn’t store your password. The next time you edit the album you’ll see “already connected: leave it empty”.
Which photos can be shown
- Regular photos: JPG, PNG, WebP, GIF (without animation), BMP and HEIC (the iPhone format).
- Many camera RAW formats: DNG, CR2, CR3, NEF, ARW, RAF, ORF, RW2 and others.
- CR3, SR2, SRF and X3F RAW files can’t be shown from the TV or a USB drive: put them in a network folder.
- Videos are not shown.